Starting up with Vapor
15 April 2026
Part 1 in a series.
Late last year, I attended the Server Side Swift conference in London. A three-day event (if you attend the workshops on day one). The main track of the conference covered many aspects and use cases for building your server using the Swift programming language using Vapor.
Conferences like this always leave me with the side effect of inspiration. They can also provide that final push toward something nagging in the back of my mind of a thing I think I should or could do. That nudge was given by a lightning talk from Mikaela Caron urging the community to reach out beyond the walls of the conference to spread our knowledge of Swift on the Server. Mikaela is prolific in the community, and if you don’t follow her work I highly encourage you to do so across the many social platforms she is on, as well as podcasts and iOS Developer Happy Hour. I also want to give a shoutout to Danijela Vrzan for her help with the technical side of getting this blog started.
I want to take this call to action upon myself to write about how I use Vapor to support the backend of my small social network app, The Midst. Since I particularly enjoy reading coding blogs with practical examples, I will attempt to provide as many of those as possible while walking you, the reader, through the process of setting up and running a backend for your app.
Vapor New
I will start from the beginning with Vapor. But I will also assume you have Swift knowledge and Xcode installed already. I don’t think you’d be here if you weren’t. But if you are new to Swift, I highly recommend reading and watching the works of Sean Allen and Paul Hudson, who offer excellent and free content to get you started with Swift.
With that out of the way, let’s get started with Vapor. Open up the Terminal app. We’re going to create a new project following the Vapor documentation. Eventually, we will hook it up to a client, also known as an iOS app or website, but let’s not get too far ahead of ourselves.
Vapor Toolbox: Vapor uses what’s called Homebrew to install the Toolbox. Using the Toolbox, we can create new projects which provide a nice template to get started. You can add Vapor packages to an existing project, but that’s not the direction I’m taking this blog. If you don’t have Homebrew installed, visit https://brew.sh and run the installation command.
Now with Homebrew installed, in your terminal, type;
brew install vapor
After that completes, we’ll create our first Vapor project. To set a theme, we’re going to build the back-end for an app that helps runners find teams to run with, using Vapor, of course. You’ll want to create this project somewhere you can return to.
In your Terminal, simply type cd and press return. You’ll see a list of folders in text format. Probably something like Applications, Desktop, Documents, et cetera. If you’d like to create your new Vapor project on your Desktop, type cd Desktop and press return. If you’d like to change to a folder within a folder, navigate to that folder in the Finder, type cd, then drag and drop the folder onto your Terminal, and it will autofill the file path after the cd. Make sure there’s a space after the cd, otherwise, you’ll see a “no such file or directory” error.
Now that we’re in the desired location for our new project, type:
vapor new RelayTeamFinder
Relay Team Finder is the name I came up with for our app (spoiler, it’s an actual app I’m building), but you can, of course, name it whatever you like. After typing vapor new RelayTeamFinder, hit return (or enter), and the Terminal should show something like this:
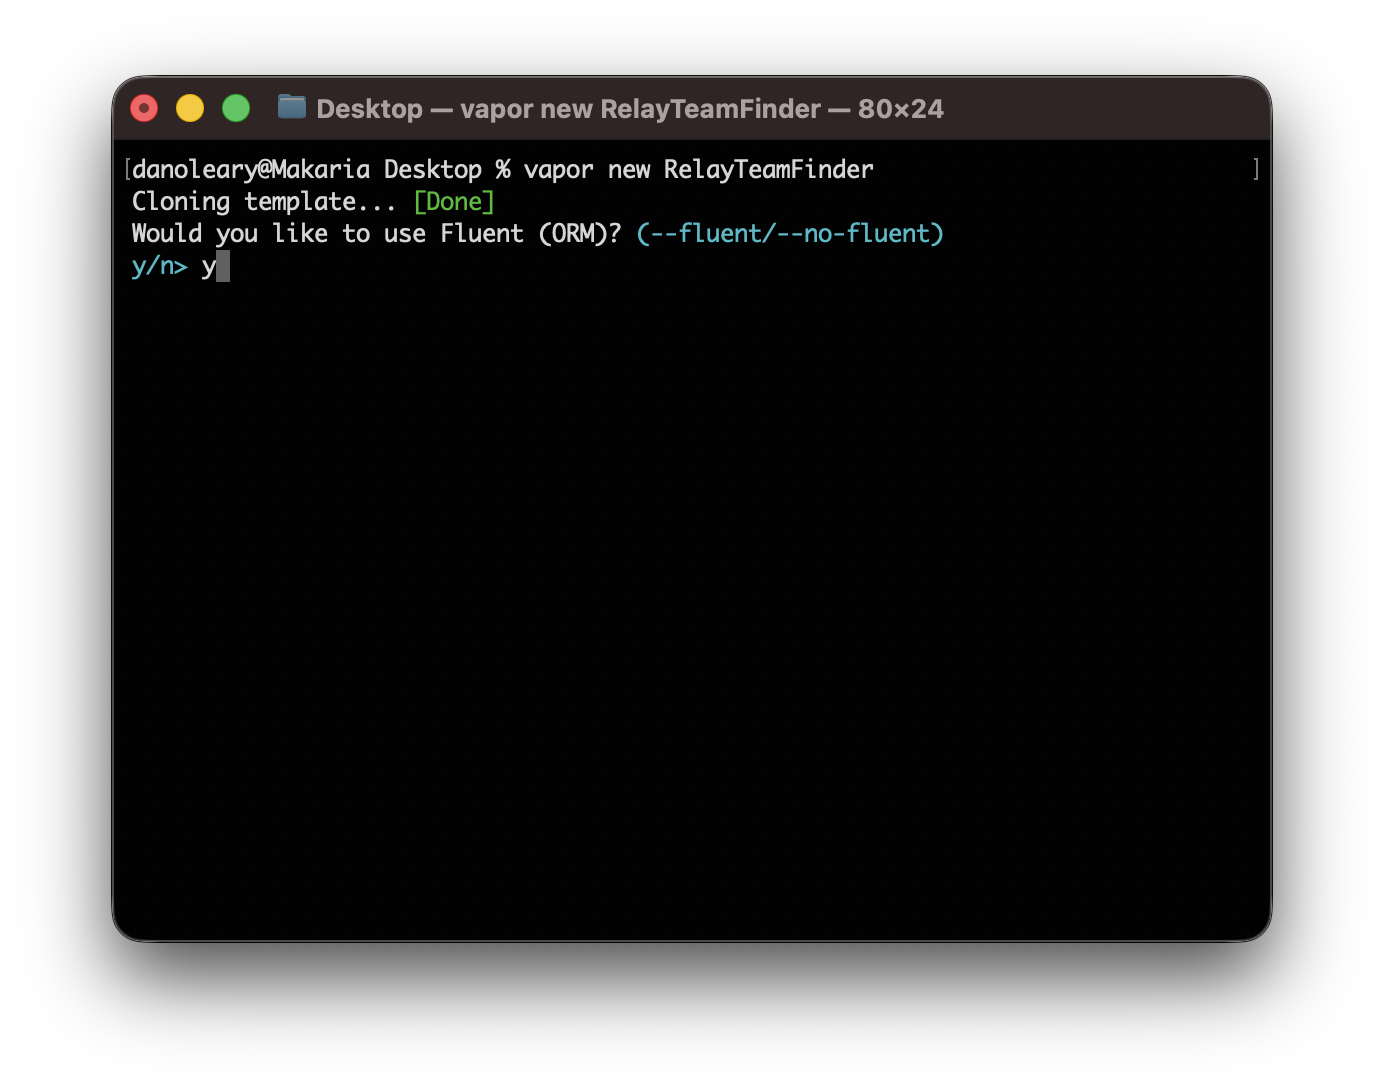
We want to use Fluent, which is an Object Relational Mapper. We’ll get into more of what that means later. But it basically helps us create tables and relationships on our server. Type y to indicate we want to use Fluent.
Next we’ll select which type of database we want to use.

Select Postgres as the database
Next we’ll select the type of database we want to use. Stick with the recommended Postgres data by typing 1.
Type n to decline using Leaf.
The last question in the setup process will be if we want to use what’s called Leaf. Leaf is generally used for HTML and we will not be building a website in this project so you can select n to decline setting up Leaf. You should see some activity in the Terminal, and once everything completes you’ll be presented with the delightful message below.
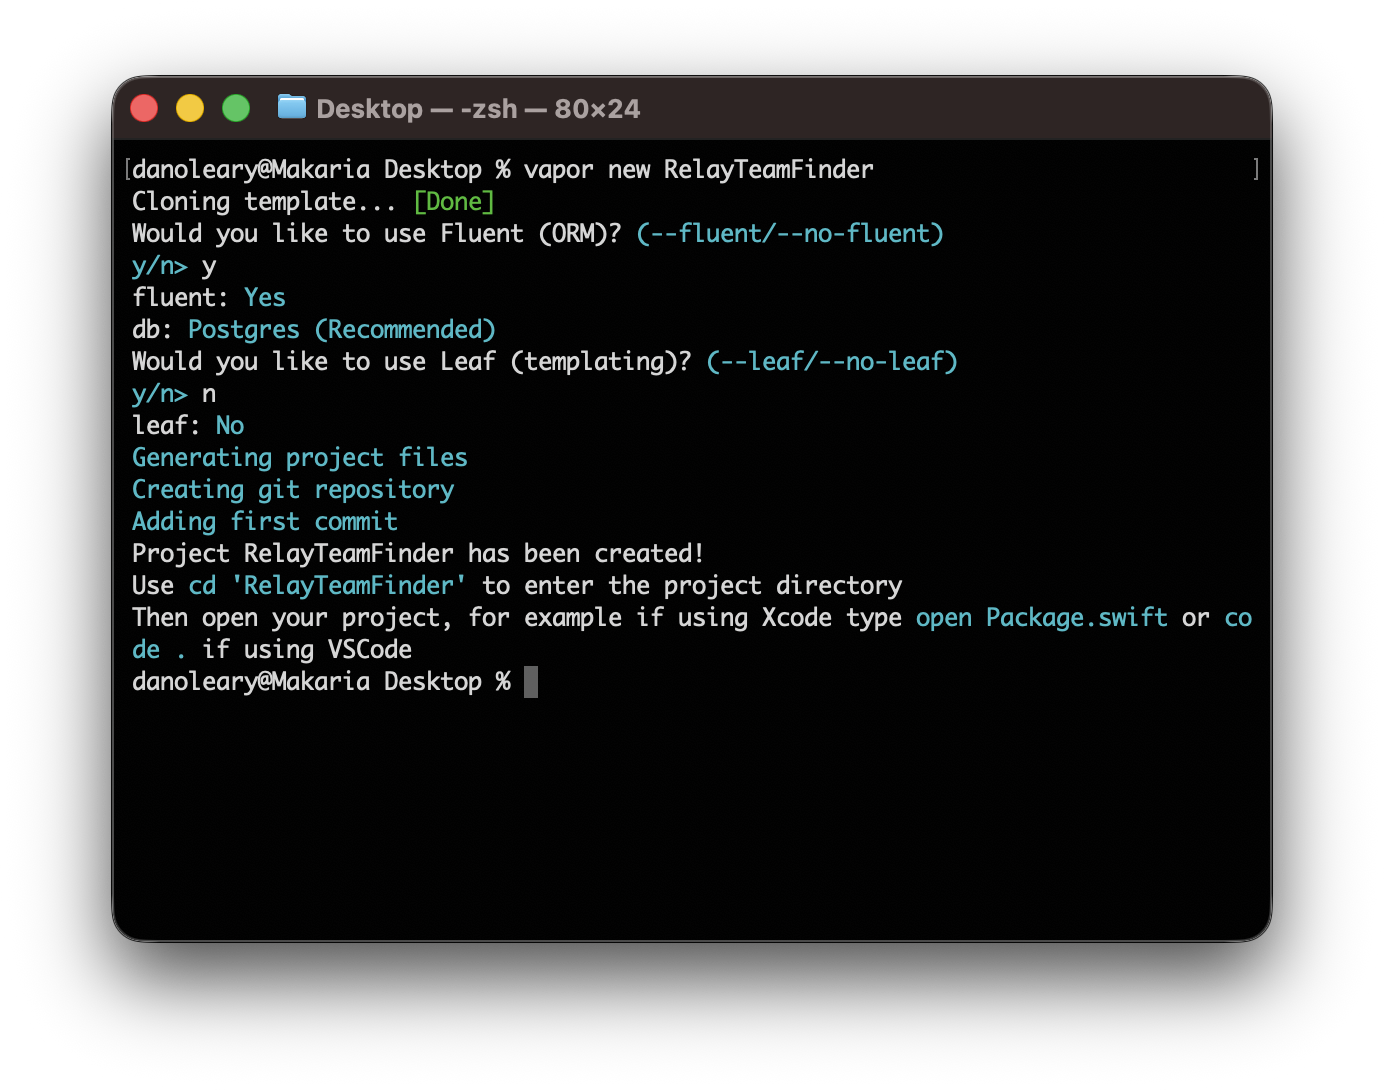
Setup Complete!
Congratulations you have just created your first Vapor project! This is the beginning of your journey to create your own custom backend for your iOS application. In the next edition of the blog we will get familiar with the file system of a Vapor project. It’s a little different than a traditional iOS App you may have built before and it deserves a little time spent familiarizing yourself with it.